Share screen - React Native iOS
This page uses the following asynchronous methods. Refer to their API reference for the errors each Promise may reject with, and handle these rejections appropriately based on your use case.
Contents
Create Broadcast Upload Extension in iOS
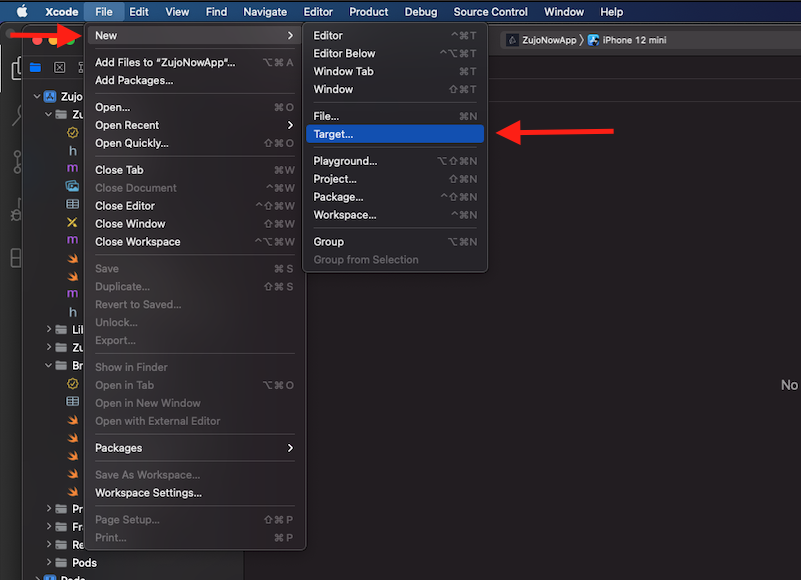
Step 1 : Open Target
Open your project with xcode, the select File > New > Target in menu bar.
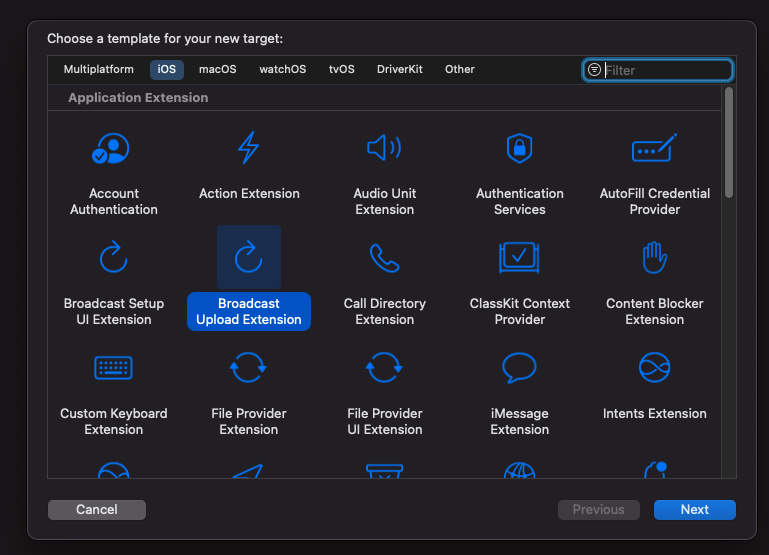
Step 2 : Select Target
Select Broadcast Upload Extension and click next.
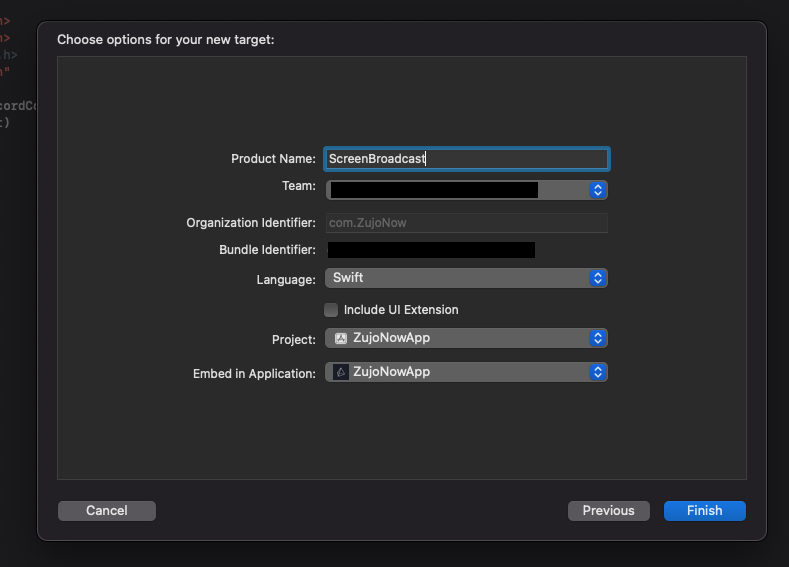
Step 3 : Configure Broadcast Upload Extension
Enter the extension's name in the Product Name field, choose the team from the dropdown, uncheck the "Include UI extension" field, and click "Finish."
Step 4 : Activate Extension scheme
You will be prompted with a popup : Activate "Your-Extension-name" scheme?, click on activate.
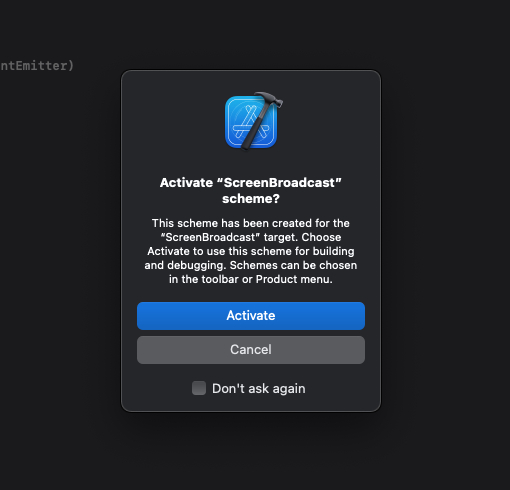
Now, the "Broadcast" folder will appear in the Xcode left side bar.
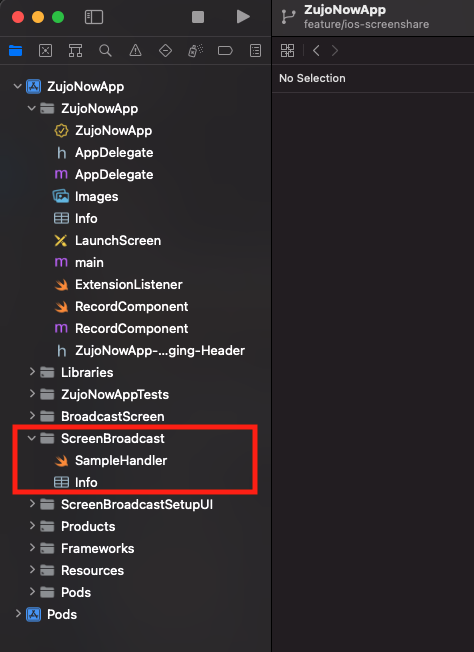
Step 5 : Add External file in Created Extension
Open the videosdk-rtc-react-native-sdk-example repository, and copy the following files: SampleUploader.swift, SocketConnection.swift, DarwinNotificationCenter.swift, and Atomic.swift to your extension's folder. Ensure that these files are added to the target.
Step 6 : Update SampleHandler.swift file
Open SampleHandler.swift, and copy the content of the file. Paste this content into your extension's SampleHandler.swift file.
Step 7 : Add Capability in App
In Xcode, navigate to YourappName > Signing & Capabilities, and click on +Capability to configure the app group.
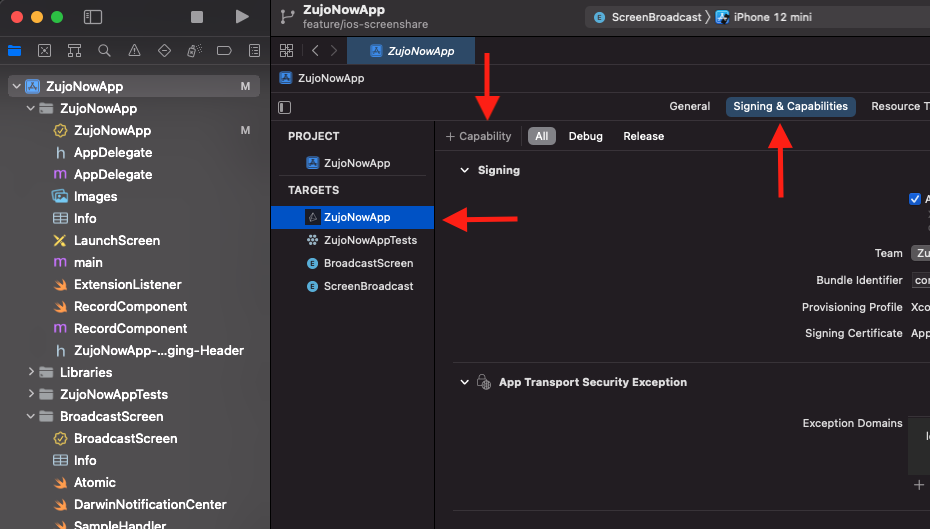
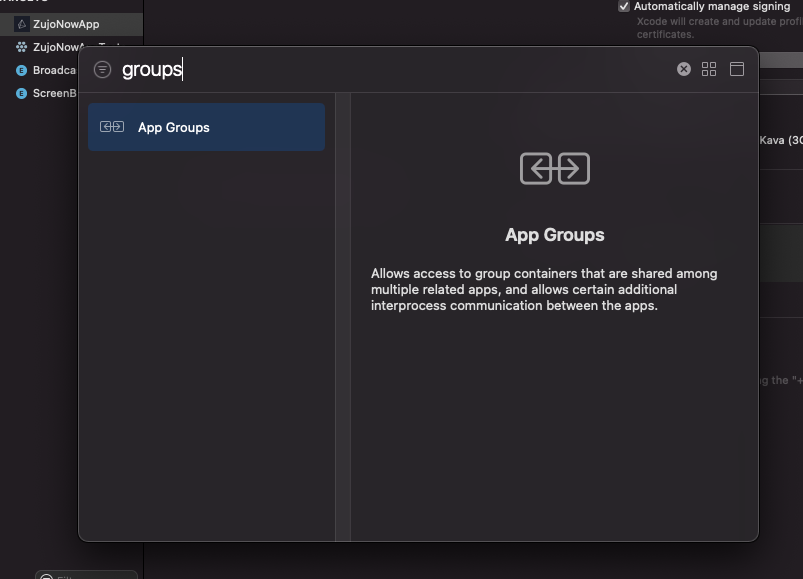
Choose App Groups from the list.
After that, select or add the generated App Group ID that you have created before.
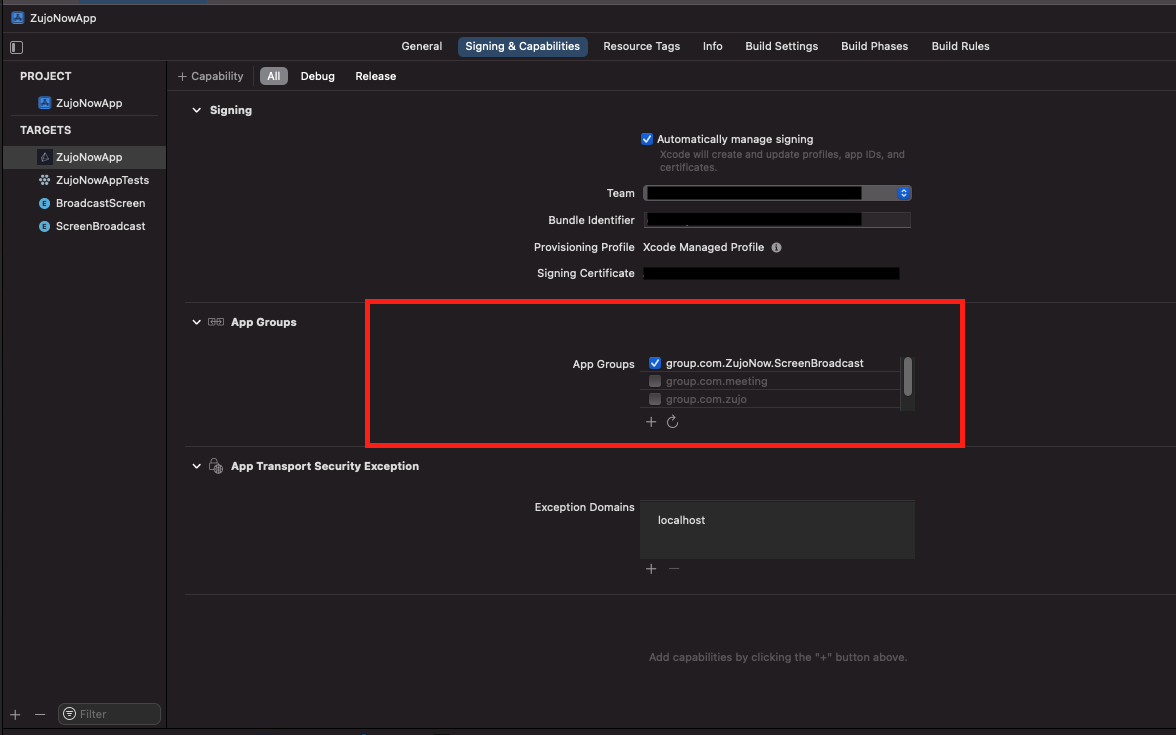
Step 8 : Add Capability in Extension
Go to Your-Extension-Name > Signing & Capabilities and configure App Group functionality which we had perform in previous steps. (Group id should be same for both targets).
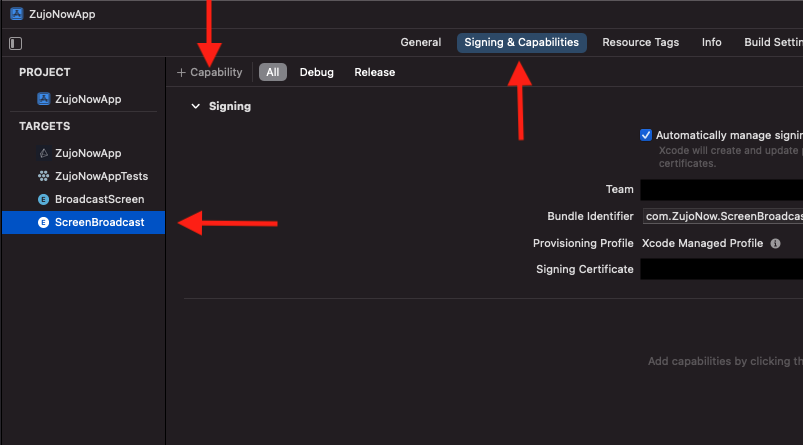
Step 9 : Add App Group Id in Extension File
Go to the extension's SampleHandler.swift file and paste your group ID in the appGroupIdentifier constant.
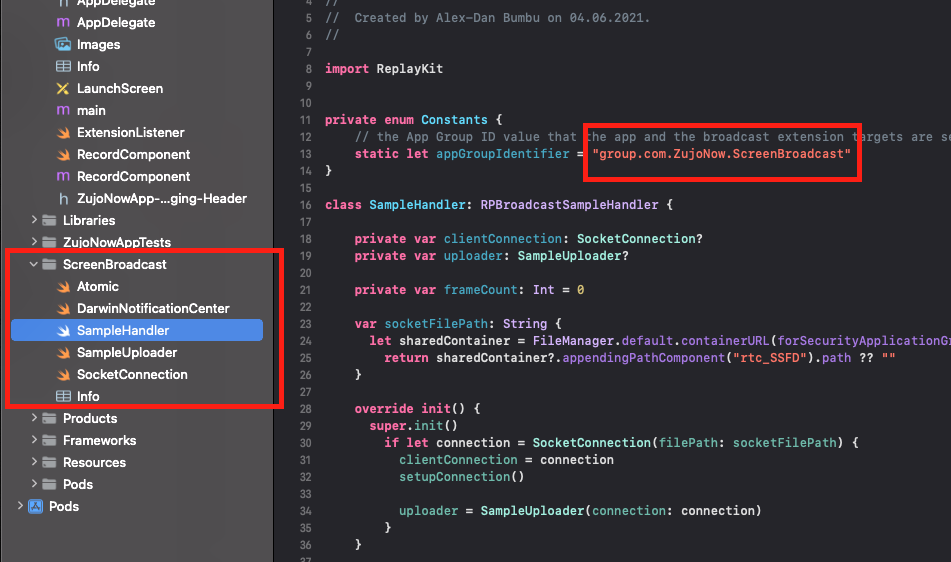
Step 10 : Update App level info.plist file
- Add a new key RTCScreenSharingExtension in Info.plist with the extension's Bundle Identifier as the value.
- Add a new key RTCAppGroupIdentifier in Info.plist with the extension's App groups Id as the value.
Note : For the extension's Bundle Identifier, go to TARGETS > Your-Extension-Name > Signing & Capabilities .
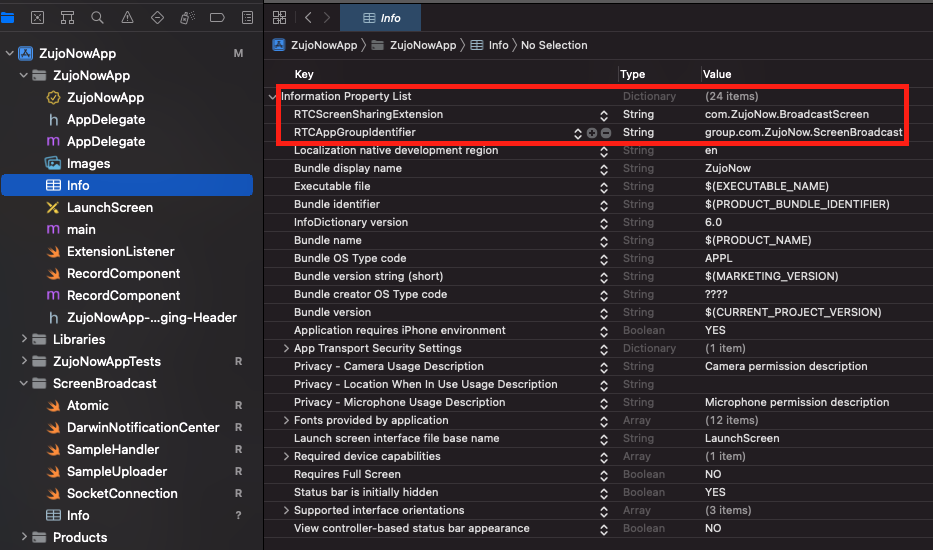
You can also check out the extension's example code on github.
Create iOS Native Module for RPSystemBroadcastPickerView
Step 1 : Add Files in iOS Project
Go to Xcode > Your App and create a new file named VideosdkRPK.swift.
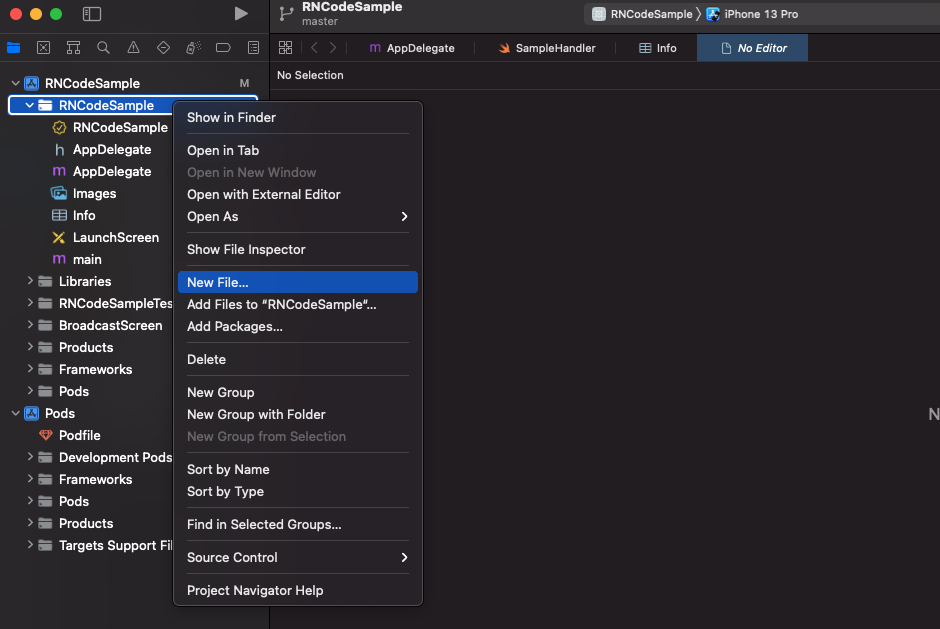
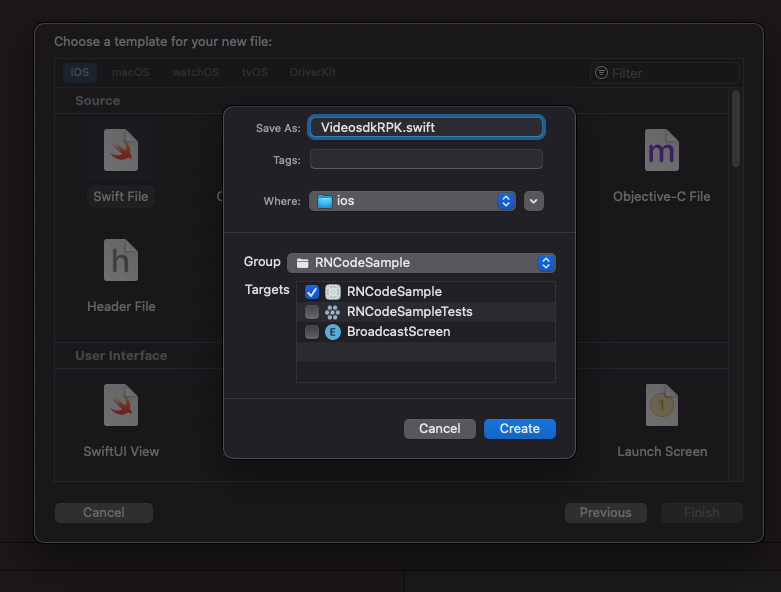
After clicking the Create button, it will prompt you to create a bridging header.
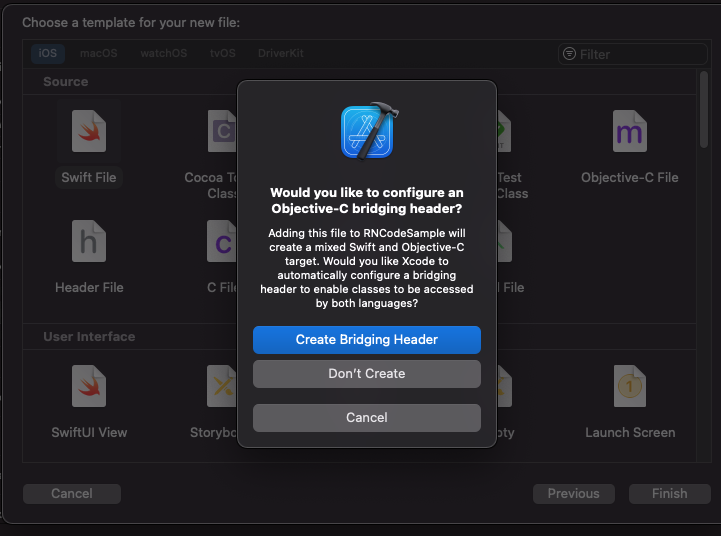
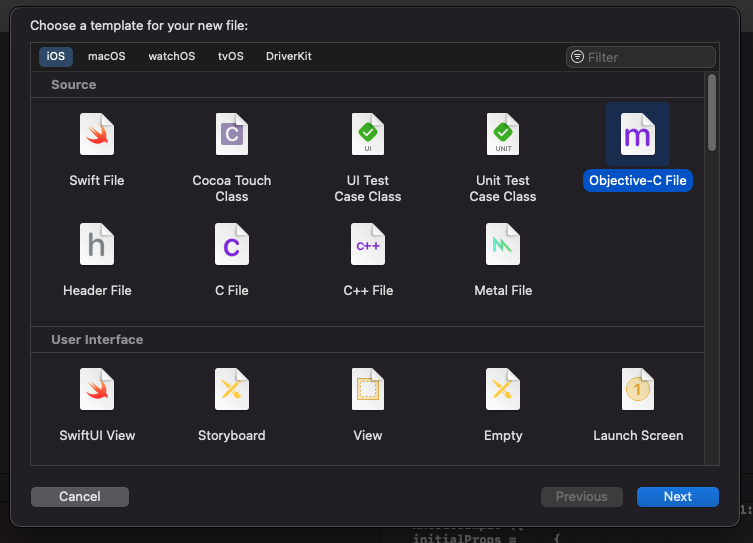
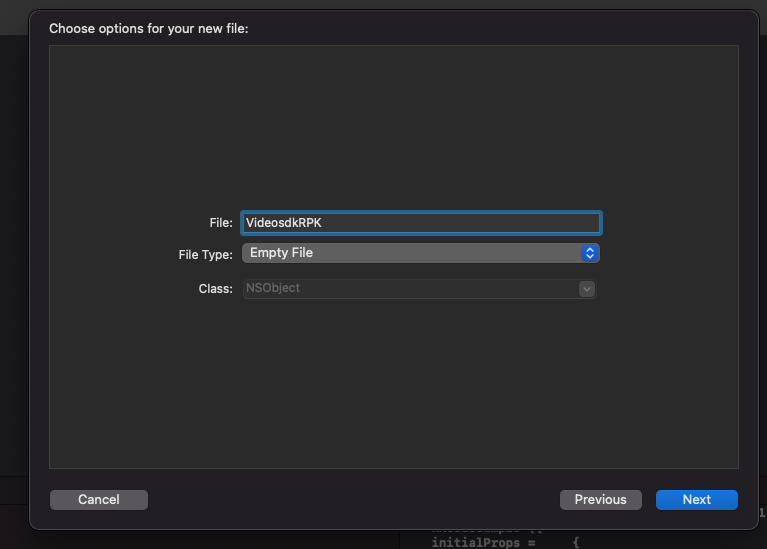
After creating the bridging header file, create an Objective-c file named VideosdkRPK.
-
For the
VideosdkRPK.swiftfile, copy the content from here. -
In the
Appname-Bridging-Headerfile, add the line#import "React/RCTEventEmitter.h". -
For the
VideosdkRPK.mfile, copy the content from here.
Step 2 : Enable Xcode Capabilities
Enable the necessary capabilities in Xcode:
- Open your project in Xcode.
- Navigate to your target settings.
- Select the "Signing & Capabilities" tab.
- Click the "+" button to add capabilities.
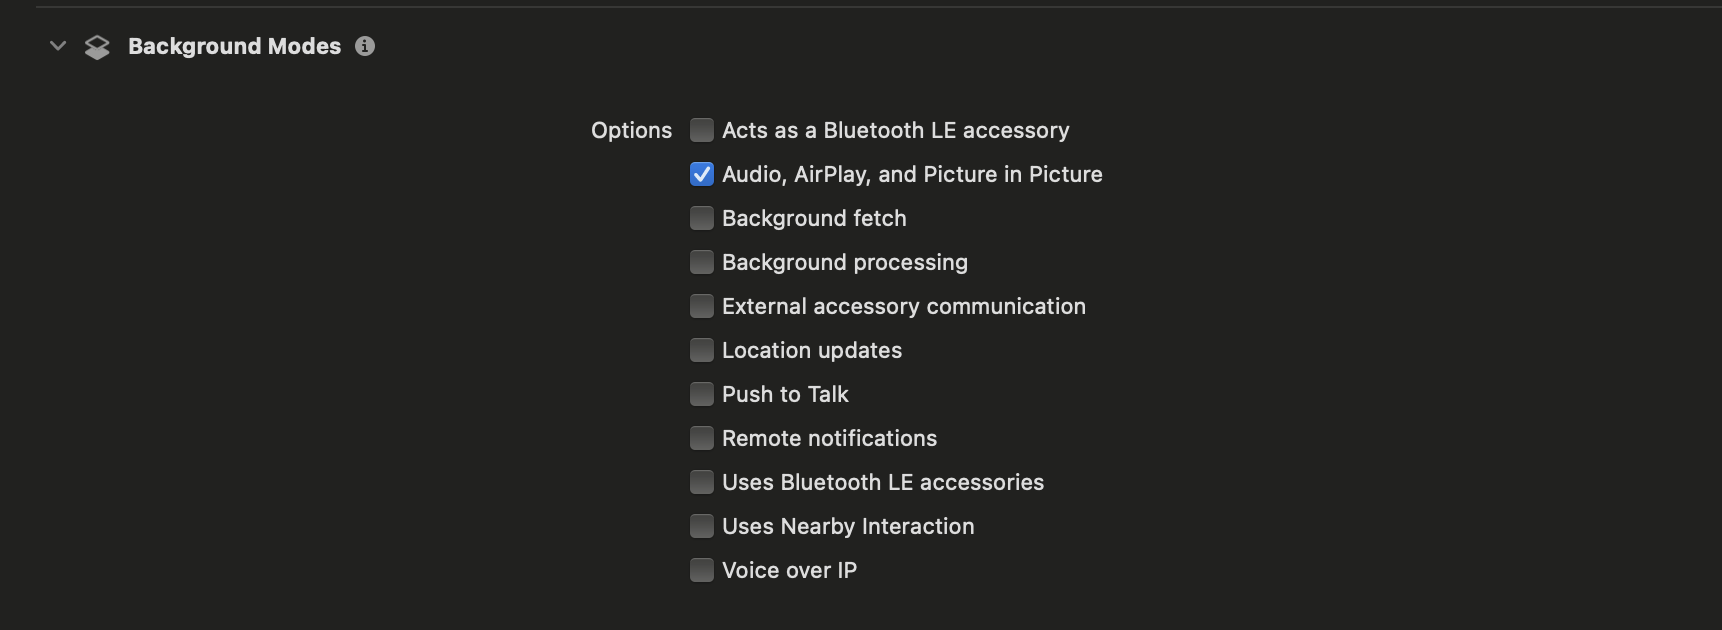
- Add Background Modes.
Under Background Modes, enable the following options:
- Audio, AirPlay, and Picture in Picture
Step 3 : Integrate Native Module on React native side
-
Create a file named
VideosdkRPK.jsand copy the ccontent from here. -
Add the lines given below for handling the enable and disable screen share event.
import React, { useEffect } from "react";
import VideosdkRPK from "../VideosdkRPK";
import { TouchableOpacity, Text } from "react-native";

const { enableScreenShare, disableScreenShare } = useMeeting({});

useEffect(() => {
  VideosdkRPK.addListener("onScreenShare", (event) => {
    if (event === "START_BROADCAST") {
      try {
        await enableScreenShare();
      } catch (err) {
        console.error("enableScreenShare failed:", err);
      }
    } else if (event === "STOP_BROADCAST") {
      try {
        await disableScreenShare();
      } catch (err) {
        console.error("disableScreenShare failed:", err);
      }
    }
  });

  return () => {
    VideosdkRPK.removeSubscription("onScreenShare");
  };
}, []);

return (
  <>
    <TouchableOpacity
      onPress={() => {
        // Calling startBroadcast from iOS Native Module
        VideosdkRPK.startBroadcast();
      }}
    >
      <Text> Start Screen Share </Text>
    </TouchableOpacity>

    <TouchableOpacity
      onPress={async () => {
        try {
          await disableScreenShare();
        } catch (err) {
          console.error("disableScreenShare failed:", err);
        }
      }}
    >
      <Text> Stop Screen Share </Text>
    </TouchableOpacity>
  </>
);
- The
VideosdkRPK.startBroadcast()method produces the following result.
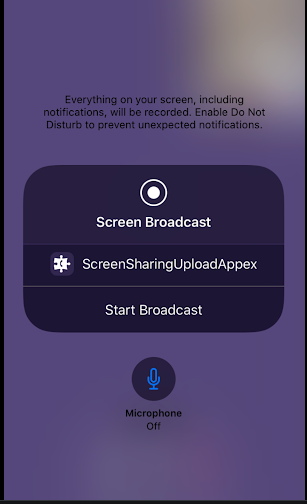
After clicking the Start Broadcast button, you will be able to get the screen share stream in the session.
Got a Question?  Ask us on discord

