Configure Recording Storage - iOS
Storage Configuration
While recording your rooms, you have the flexibility to store them either on VideoSDK's storage or configure your own storage solution such as AWS S3 Storage, Azure Blob or GCP Cloud Storage. To set up your own storage, you can navigate to the API section in the VideoSDK Dashboard.
-
This feature allows you to configure storage provider for your room recordings.
-
You can configure a different storage provider for each API key.
-
Currently, we support
AWS S3,Azure BlobandGCP Cloud Storage.
Prerequisites
- An active VideoSDK Developer Account
Aws S3,Azure Blob StorageorGCP Cloud StorageCredentials
How to setup ?
Step 1 : Select Api Key
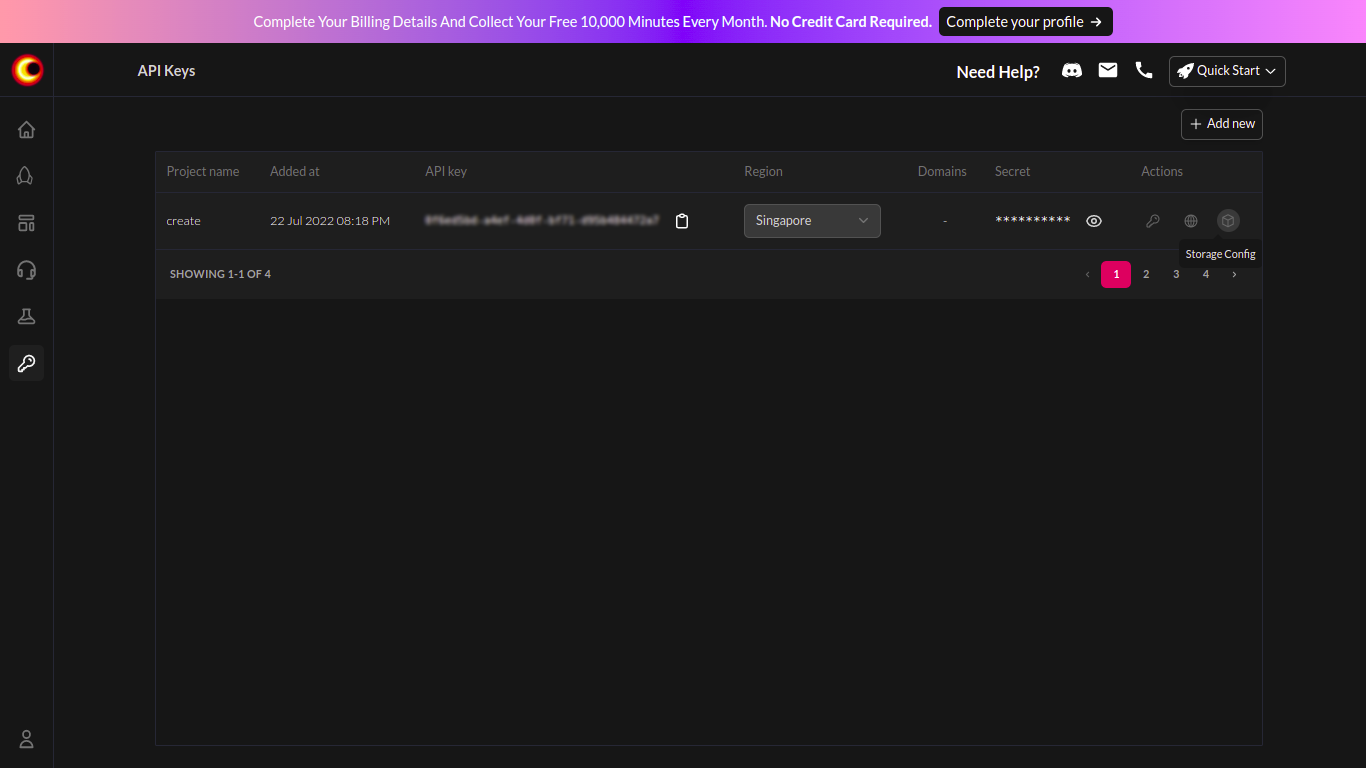
- Go to VideoSDK Dashboard.
- Select API Key for which, you want to set storage configuration.
- Then click on
Storage ConfigIcon in Actions.
Step 2 : Choose Cloud Storage Provider
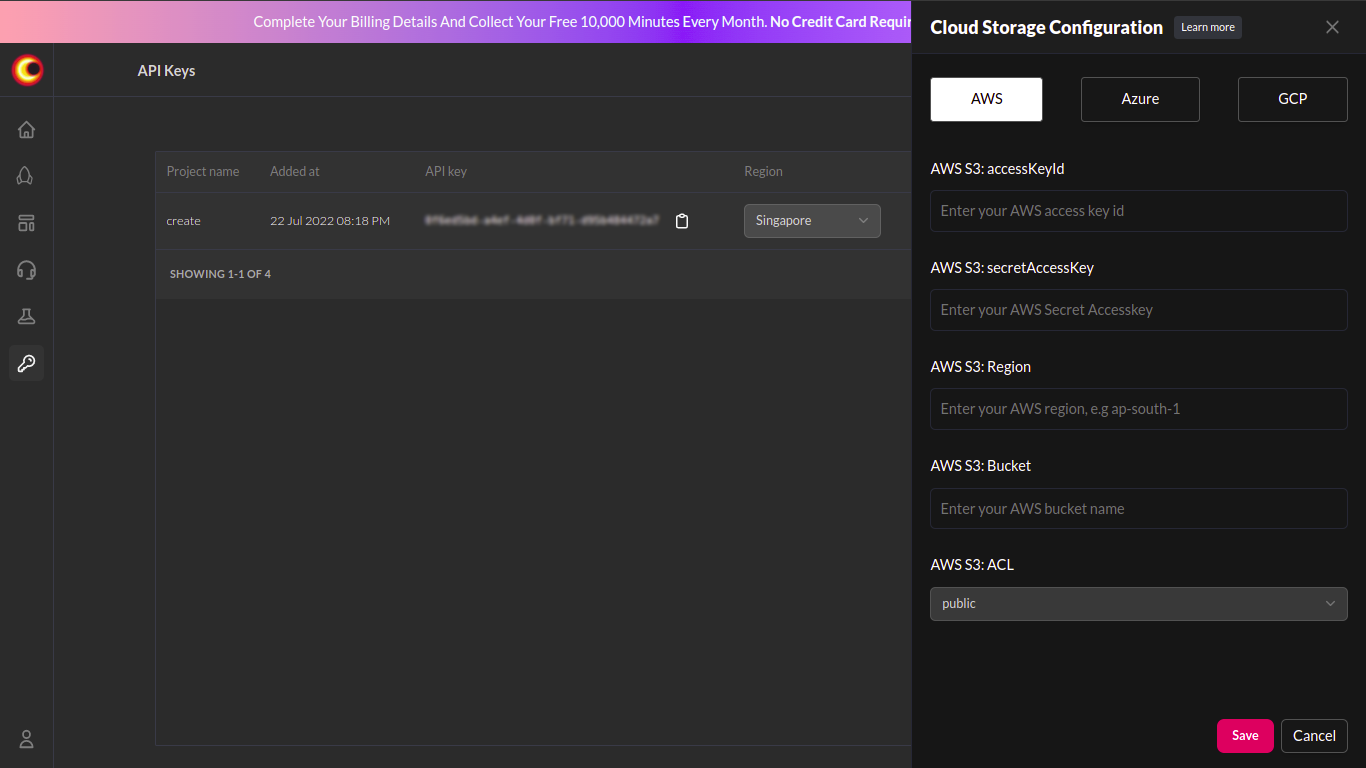
- As you can see in the image, there are 3 Cloud Storage Provider (
Aws,Azure,GCP). - You can select a Cloud Storage Provider as per your requirements.
Step 3 : Configure Bucket or Container
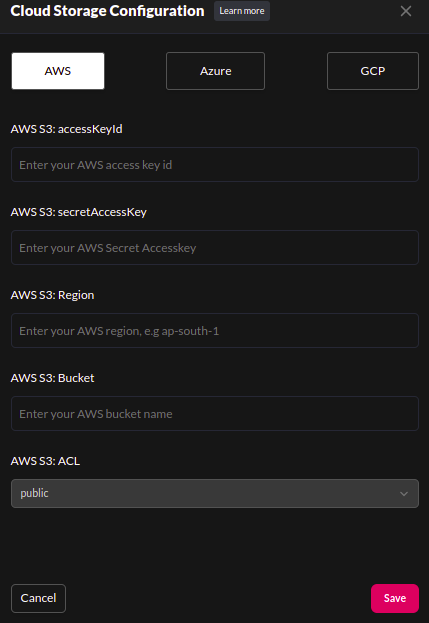
For Aws S3 Storage
-
You will need AWS S3 Bucket. Learn to create S3 Bucket.
-
As you can see in the image, you will need to enter
accessKeyId,secretAccessKey,region,bucket, andACLto set up AWS S3 Storage. -
Click on
Savebutton.
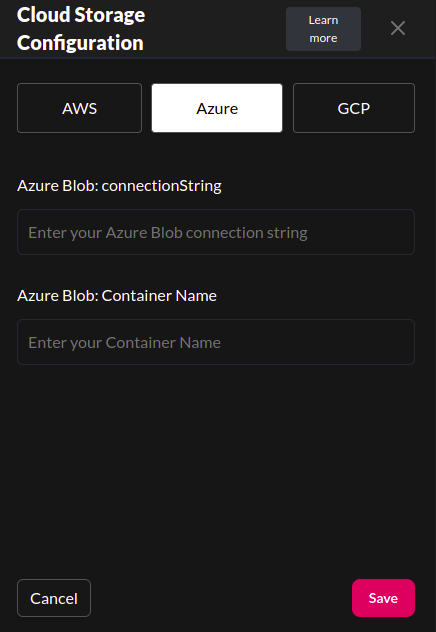
For Azure Blob Storage:
-
You will need Azure Blob Container. Learn to create Blob Container.
-
As you can see in the image, you will need to enter
connectionStringandcontainerNameto set up Azure Blob. -
Click on
Savebutton.
For Google Cloud Storage:
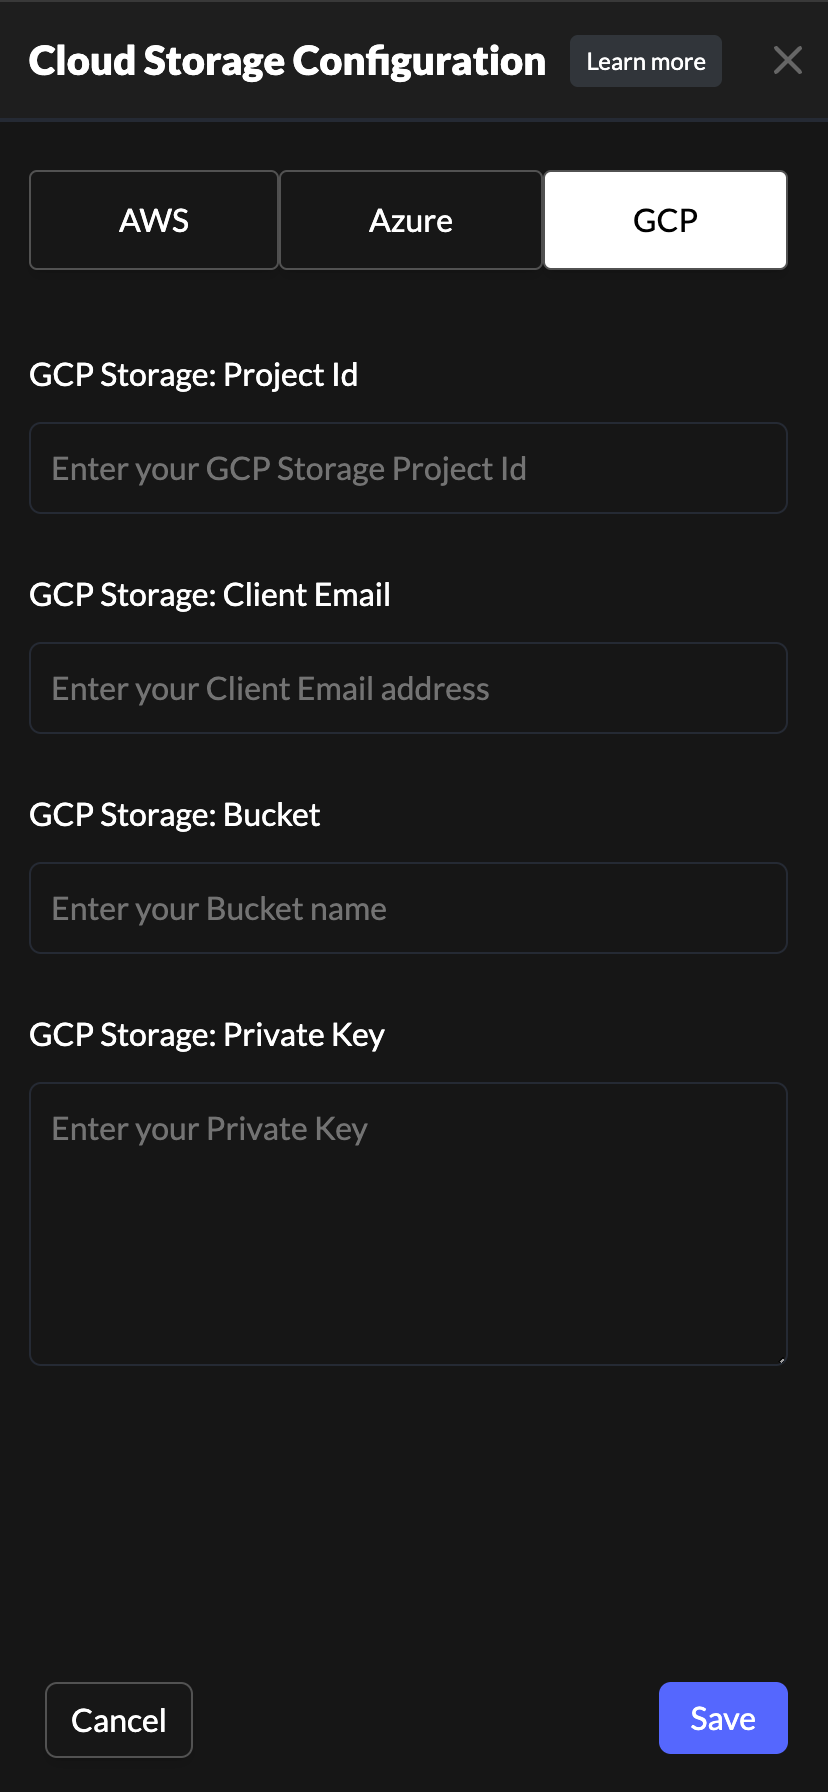
-
You will need Google Cloud Storage Bucket. Learn to create Google Cloud Storage Bucket.
-
After creation, click on the ︙ button in the upper right corner and select
Project settings. -
Under
IAM and Admin, selectService Accounts. In the service account list, click on the ︙ button for the account just added or created before, and selectManage keys. -
Click
ADD KEY > Create new key. SelectJSONin the pop-up box and clickCREATE. A json file is downloaded with the name formatprojectId-xxxxxxxx.json. -
Open the downloaded json file, which looks like the following example:
{
  "type": "service_account",
  "project_id": "videosdk-12345",
  "private_key_id": "yourprivateidkeyyourprivateidkeyyourprivateidkey",
  "private_key": "-----BEGIN PRIVATE KEY-----\nThisisYourPrivateKeyThisisYourPrivateKeyThisisYourPrivateKey\nThisisYourPrivateKey\nThisisYourPrivateKey\nThisisYourPrivateKey\n-----END PRIVATE KEY-----\n",
  "client_email": "xxxx-xxxx@videosdk-12345.iam.gserviceaccount.com",
  "client_id": "123456789012345678901",
  "auth_uri": "https://accounts.google.com/o/oauth2/auth",
  "token_uri": "https://oauth2.googleapis.com/token",
  "auth_provider_x509_cert_url": "https://www.googleapis.com/oauth2/v1/certs",
  "client_x509_cert_url": "https://www.googleapis.com/robot/v1/metadata/x509/videosdk%40videosdk-404307.iam.gserviceaccount.com",
  "universe_domain": "googleapis.com"
}
-
As you can see in the image, you will need to enter
Project Id,Client Email,Bucket,Private Keyto set up a Google Cloud Storage Bucket. You can retrieve these details from the json file. -
Click on
Savebutton.
Step 4 : Test
- Create Room with a token generated from the API key you configured.
- Join the room with the created roomId and start recording.
- Then, you can see that recording will be available in your Bucket or Container.
- An API key can have only one recording storage config at a time.
- In order to add new Recording Configuration, first you need to delete current configuration.
Got a Question?  Ask us on discord

